Questions and Answers on

Getting it right from the ground up!

Wooden fences are increasingly popular with homeowners nowadays.  Although it’s debatable as to whether they increase property value, they do offer a number of benefits.  Besides defining the boundaries of your property and enhancing security, a fence can provide the privacy that allows you to comfortably enjoy the outdoors . . . particularly in our era of shrinking lot sizes.

The condition of your fence is something to pay attention to when it comes to the upkeep of your home.   We’ve all seen examples of warped, leaning, discoloured or damaged fences that detract from a home’s appeal.  Being such a prominent feature, there’s no question that a dilapidated fence can make your home look neglected.

When it comes to installing a fence, the importance of its foundation cannot be overstated.  So, in consultation with reputable and long-established contractors in the field, we’ve waded through all the contradictory information you’ll find from varying sources to bring you the most comprehensive guidelines on the best practices in installing fence posts.

By all accounts, the care you put into this step of the fence-building process will pay dividends in the durability and longevity of your fence.

What are the codes governing the installation of fences and posts?

Before starting construction of your new fence, check that your plans comply with local codes and that you obtain permits where necessary.  This will ensure that your proposed project adheres to rules governing things like:

  • Set-backs from property line
  • Height restrictions (specified according to side of property)
  • Distance from neighbouring properties or structures
  • Acceptable building materials
  • Traffic sight obstruction on corner lots
  • Interference with drainage swales
  • Enclosure of a swimming pool

There may also be restrictions specific to new subdivisions on which you should consult with your builder.  For instance, all grading and sodding may need to be completed on adjacent lots and certified by the developer’s engineer before you can proceed with fencing.

And as always, before digging contact Ontario One Call to locate any underground cables or lines below the surface.

How deep should the fence post go into the ground?

The depth of your post hole is a key factor in the strength of your posts.

*Most online sources prescribe a general rule of thumb for setting a post as a depth of one-third to one-half of the actual above-ground height of the post.  By this guideline, a six-foot-high finished post should be buried two to three feet into the ground and an eight-foot fence would require a depth of 32 inches to 4 feet.

*Many experts recommend digging about 6 inches below that to place gravel at the bottom of the holes prior to placing posts in order to avoid trapping water.  If you’re setting a post into soft ground, or in an area that experiences high winds, it’s a good idea to bury your posts a little deeper and anchor with more concrete.

In determining depth, you must also take the frost line in your area into consideration.  All fence posts should be cemented in the ground below frost level.  If the footing does not extend below the frost line, it will heave as the ground freezes and thaws.

How large do my post holes need to be?

The width of your post hole depends on the size of post.  *While 4” x 4” and 6” x 6” are both commonly used sizes, the general consensus points to the larger being much more stable, durable and long-lasting given the minimal added expense.  Some installers claim that fences built with the more solid 6” x 6” posts will outlast the 4” x 4” by five to eight years.

*Most online sources propose that the diameter of your post hole should be three times the diameter of your post.  This would mean if you’re setting a four-inch square post, your post hole would need to be 12 inches in diameter and 18 inches for a six-inch square post.

Bob Vila TIP:

It’s important to note that fence-post holes must be flat-walled and barrel-shaped, maintaining a consistent diameter from top to bottom.  If you use a regular shovel, you’ll end up with a cone-shaped hole.  Instead, make quicker and easier work of the task by opting for a posthole digger (available for rent at your local home center).  Otherwise, use a clamshell digger, which will be slower going but equally effective, particularly if you’re working with rocky soil.

What do I need to know about filling with concrete?

Start with a gravel base

*To help prolong the life of your fence, many sources contend it is a good practice to dig a little deeper to place at least 6″ of clean, clear 3/4″ gravel at the bottom of the holes prior to the placement of posts.  Tamp down the gravel when half-filled and again when fully filled.  This allows for added protection by providing drainage for ground water to drain away from the end cut of the wood, delaying rotting and cracking.

Fill with concrete

There are differing opinions among online sources as to whether to pour the concrete above the surface or below the surrounding soil at the base of your fence posts.  Proponents of pouring slightly above grade suggest that the wood is kept dryer while those favouring below the surface want to avoid the ‘mushroom’ effect.

How much concrete do I need for each hole?  How many bags?

*The following link provides a useful tool to determine how much concrete will be needed for your project and even approximate cost.  Simply scroll down to the Post Hole Concrete Calculator and enter all your variables.  It will estimate the amount of product you will need and give you options in terms of sizes sold.

https://www.everything-about-concrete.com/how-much-concrete-for-a-fence-post.html

Is gravel fill a workable option?

Concrete is widely considered the most secure material for setting fence posts, and the only thing that will truly keep your fence posts firmly in place.

However, there are some who swear by gravel in specific circumstances.  Gravel is less expensive and allows drainage that helps to prevent the rotting of buried wood.  This assumes a soil with ‘good percolation’ that does not allow water to sit, yet has the stability of a clay textured soil.  It also makes for easy replacement of the fence when the time comes.  The downside is that your fence will be more prone to leaning or wobbling.  For this reason, gravel supported posts lend themselves to fences that are not subject to a great deal of lateral pressure, such as an open-sided livestock enclosure.

For those choosing the gravel method of support, dig the holes the same way as you would to set posts in concrete.   Traffic bond or pea gravel are commonly used for this method.  Gravel that is roughly three eighths of an inch in size is generally a good medium between drainage and support.  Before choosing, you may want to consult a contractor who can advise what kind of support is needed based on ground and weather conditions in your area.

Sika Post Fix:

Sika Post Fix is a fairly new product on the market you may have heard about.  It is presented as an easy-to prepare, mix-in-the-bag and fast-setting polyurethane foam for supporting and backfilling fence, mailbox, gate and signage posts.

From online reviews, the jury is out on the satisfaction with this product.  Feedback suggests that it is more suitable to the lighter applications mentioned but lacks the strength and stability to support a fence long-term.

Sika Post Fix
Sika Post Fix

Maintenance and Life Expectancy

* A well-built and well-maintained fence should last anywhere from 15 to 25 years, but since fences withstand year-round exposure to the elements, checking the condition of your fence on a regular basis is a good idea to ensure its integrity.

Posts are usually the first to go.  Besides tolerating more contact with water at the base, use of a lawn edger over time can add wear and tear.  Panels survive longer as they typically don’t touch the ground.  Redwood, cedar or pressure-treated pine have the best record of lasting.

*When your fence is newly built, allow the wood to weather and wait a year or two before treating.  Applying a wood preservative to seal it every two or three years ongoing will enhance the appearance and add to the longevity of your fence.

To protect your fence posts from the get-go, install fence post caps as soon as the fence is built.  Post caps are both a decorative finish and a solution to damage from the elements on the most vulnerable part of the post.  Plastic resin fence caps are the best option as they don’t rot as do wooden ones or fade and become brittle like vinyl.  Resin offers a high level of UV resistance and with colours molded into the material, they are not prone to fading.  Make sure that your post caps fit well but not too tightly.  When post caps are too snug around the post, they could crack as the wood expands.  A too-snug fit won’t allow any ambient moisture to evaporate which can cause your posts to rot more quickly.

*Some online sources recommend filling the seam where the wood meets concrete with a top quality exterior acrylic latex caulk, or special silicone designed to stick to concrete, at the base of the post to seal the gap.  Even if no gaps appear when the fence is new, they can form over time due to repeated thawing and freezing, wetting and drying.  This is something that should be kept up along with regular fence maintenance.

Sealer vs. Stain Wood Preservatives

Sealer

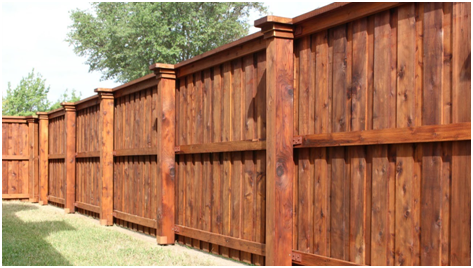
If you like the natural look of your fence, sealer is the best option for you, as it will protect your wood without changing its colour.  Sealer is also useful if you plan to paint the fence after sealing it.

Stain (Solid or Semi-transparent)

If you want a darker look for your fence, but don’t want to paint it, a good wood stain can give you the look you want.  Additionally, stain does a better job of hiding imperfections.

A third option is to use both stain and sealer to get a darker look and add extra protection for the wood.  Note that you need to check the labels to ensure the stain and sealer you choose are compatible.

In conclusion

Getting your posts right sets a good foundation for a well-built fence.

This article is intended to educate you about the choices facing you when taking on a fence project – including both the information that dominates your website searches and the advice coming from professionals with real-world experience.  The discrepancies reinforce the importance of smart planning, quality workmanship and materials, as well as recognizing whether your project is a job for professionals.

Armed with this knowledge, we hope that the fence you achieve remains secure and enhances your property for years to come.

Canadian Home Inspection Services thanks our Niagara area fence experts for sharing their valuable knowledge with our readers.

Mike Tirimacco of Niagara Fence Builders https://www.niagarafencebuilders.com

Rob Johnston of Rob’s Fencing Inc. https://robsfencing.com